We do think that our tech blog is full of interesting things powered by our engineers’ great stories. Let me take you on a journey of how we maintain the trivago tech blog from the technical perspective and how we recently automated its deployment process.
Having a decent tech blog is an important thing when it comes to visibility in the tech world. Here at trivago, we care about sharing knowledge and learning from each other. Why would that knowledge sharing stop at the boundaries of our company?
The trivago tech blog is a generated static website. We use Hugo, an open-source static site generator, for it. It allows us to create blog posts written in Markdown in a well-structured way in the repository. Of course, it is also super fast!
This way we maintain a repository that has all the content in it. The tech blog is generated by Hugo and hosted on Github Pages.

We used to use a Jenkins Job Builder for its production deployment. Recently we wanted to automate its deployment process and this was one of my tasks. Let me give you an example of what a person had to do when writing a blog post:
- Fork the repo, create a branch
- Add article as Markdown
- Deploy the tech blog to the staging environment manually
- Create a pull request, wait for reviews
- After the merge into the master branch, ask someone to run the build job to publish the tech blog to production.
It looks straightforward at first glance but, doesn’t it look like a lot of manual steps as well? As an engineer who is working in the DevOps area, I said “oh yeah, we need to automate many things in this procedure!” and started working on it.
Problems with the old process
- The Jenkins Job was stored in a different repository which was maintained by our Release and Test Automation team. This makes it hard to do code review/iteration on the Jenkins Job.
- Deploying your branch to the staging environment required some technical knowledge. We use Mesos and Marathon for launching the application as a Docker container. Besides that, it was a manual process. You had to download a JSON job definition, change some values in it and deploy it to the staging environment on your own.
- Only a few people had the right to deploy the tech blog to production. That meant that you depended on people to proceed even though you had the approvals for publication.
What we did to improve and solve the bottlenecks
- Create a Jenkins pipeline and store it in our tech blog repository.
- You can put your Jenkinsfile into your repo, and create a pipeline in Jenkins. Whenever you run that job, it will take the pipeline code from the git repo.
- In this case, everyone would be able to see what the deployment does. This allows them to debug or even contribute to it.
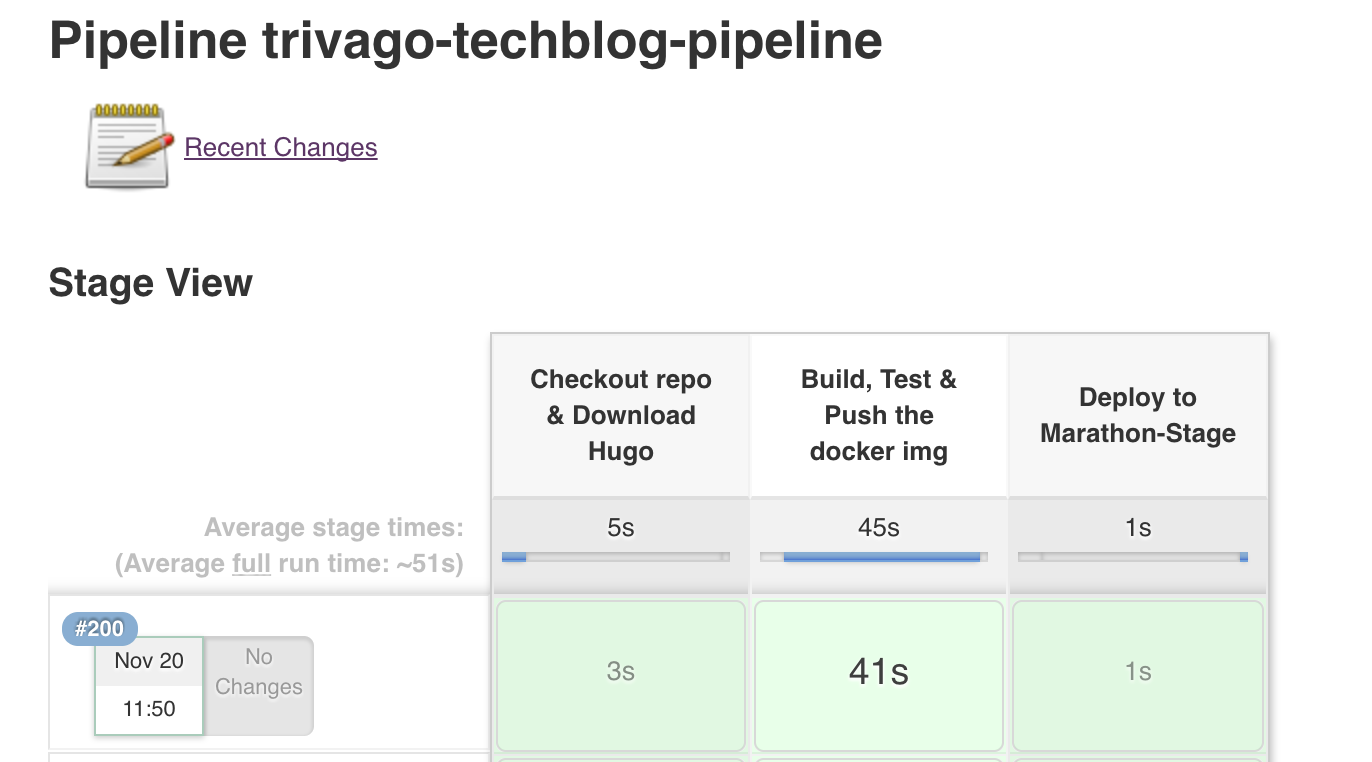
- The stages of the Jenkins Pipeline increased the transparency as well.
Our new Jenkins production deployment pipeline now looks like this:

- Automate the staging deployment.
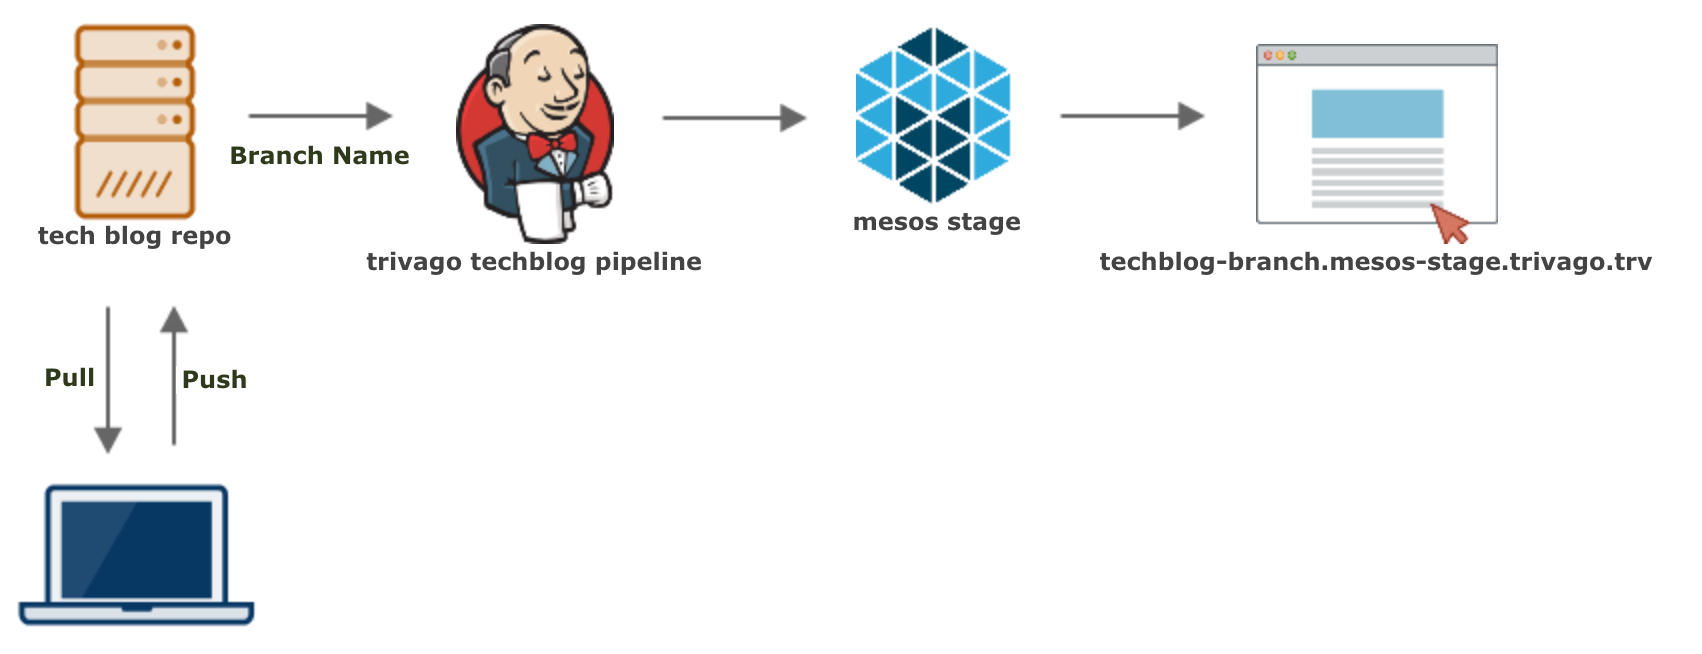
- Jenkins pipeline takes the branch name as a parameter.
- This way we can use the same preview process for every new blog article.
- Created a hook in the git repository that triggers the Jenkins Pipeline with the branch name. So, every commit to a branch in the tech blog repo would trigger the deployment to the staging environment with the specific branch content.
See the workflow below:

Having an up-to-date staging environment that always holds the current versions of new articles helps reviewers a lot. It means that they can conveniently review a new post in the browser instead of the code review tool, where there are no line breaks and the text was cumbersome to read.
It is a very satisfying feeling of accomplishment for both, the author and the reviewers, to see the tech blog being deployed after each change.
The stages look like this, if the pipeline is triggered with a branch name parameter.

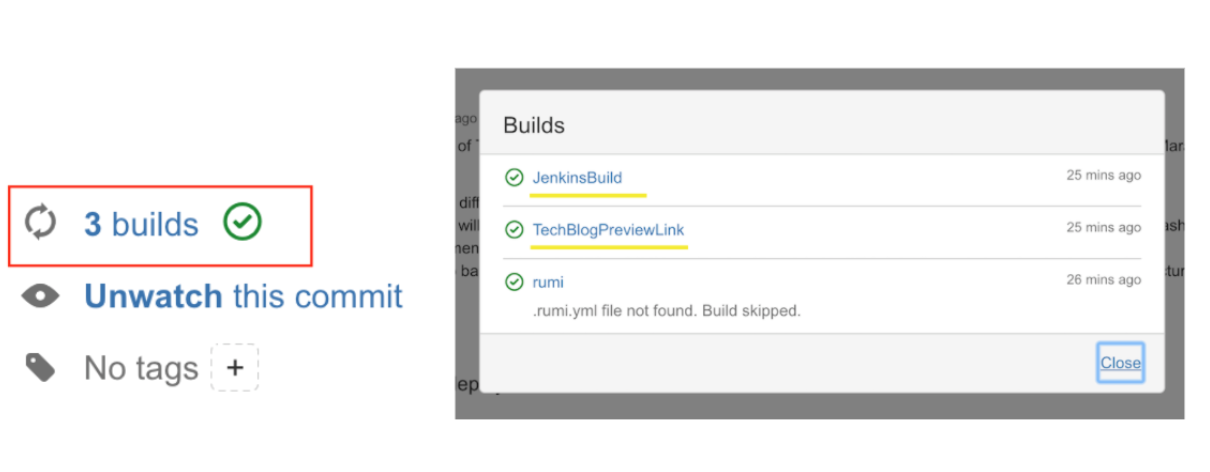
After each commit, the status of the Jenkins Build and the tech blog link are pushed back to Bitbucket. The committer is able to see the deployment details, also the link to the tech blog that is on stage.

- Make the pipeline available to everybody who is authorized to log into our Jenkins.
- This way, people are able to deploy the tech blog to production to publish their new blog post after they get the approvals for the release.
- They can also always run the pipeline with any branch name in the repository to deploy the tech blog to the staging environment.
This was an exciting task for me especially as a blogger and a Software Engineer who enjoys automating things. I loved making this process better for everybody. This new process also encourages our colleagues to share and write more because it is now easier to see what they are creating.
I would like to thank my dear colleague Matthias Endler for sharing his ideas with me during this automation task and my team lead Andreas Grunwald for initiating and supporting this movement.
Happy blogging everyone!

Follow us on